Back to Event Manager Main Menu
Managing My Profile
Once you have an account in Event Manager, you can access and manage your personal information. This includes viewing a list of your events, managing email notification settings, editing your name and password, and more.
NOTE The old legacy My Profile page has been decommissioned and a new way to Manage Your Profile is now available. A pop-up message appears on the screen guiding you to the new way of managing profile.
How To access My Account?
-
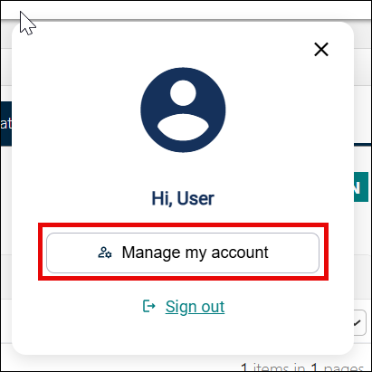
Click the Profile icon from the upper right section of the header.

-
The user profile menu appears on the screen with Manage my account and Sign out buttons.
-
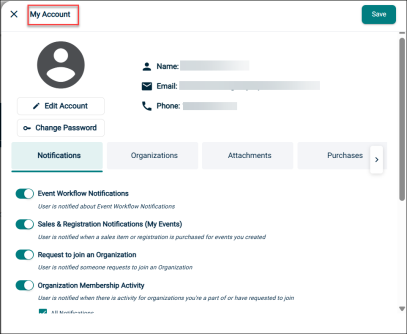
Upon clicking Manage my account button, a side menu with the My Account appears with your account details.
How to Manage Your My Account Page
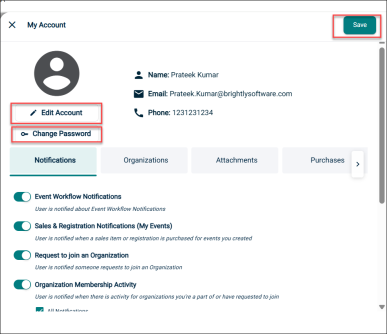
The My Account page displays your personal details such as, such as name, email, phone number, and address and other tabs like Notification and Organizations.
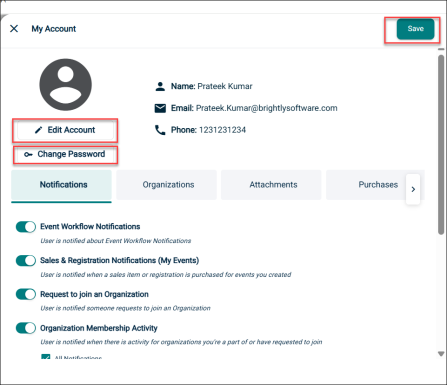
You can edit your account details and change your password from this tab.
Edit account
-
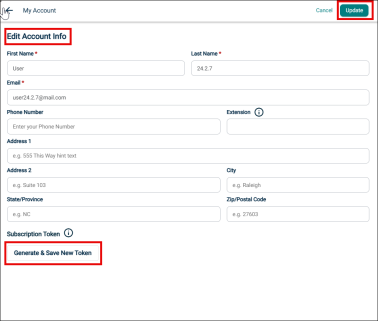
Click on Edit Account button under the profile icon.
-
This will open Edit Account Info tab.
-
Make the necessary changes and click Save button from the top right corner.
-
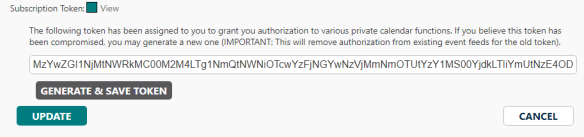
You can also receive a Subscription Token that will allow you to subscribe to private event feeds.
-
Click Generate & Save New Token button to generate a new token.
-
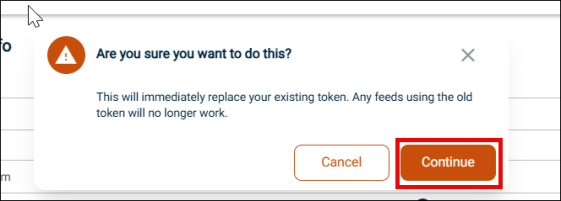
It will give a pop-up asking for confirmation to generate a new token, click Continue.
NOTE This will remove authorization from existing event feeds for the old token.
-
Click Update to save all changes.
Change Password
-
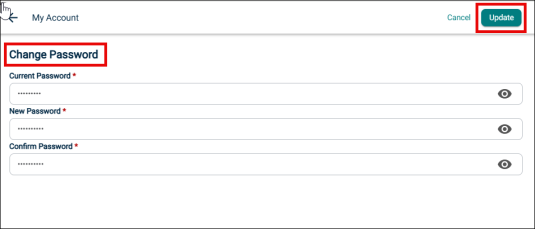
Click the Change Password button if you would like to change your password.
-
Enter your Current Password.
-
Enter your New Password, then re-enter it.
-
-
Click Save to update your password.
Notifications
The Notifications tab allows you to manage all email notifications you would like to receive about Tasks in Event Manager.
You can use the toggle button to enable and disable notifications for the following tasks:
-
Even Workflow Notifications
-
Sales & Registration Notifications (My Events)
-
Request to join an Organization
-
Organization membership activity
Organization
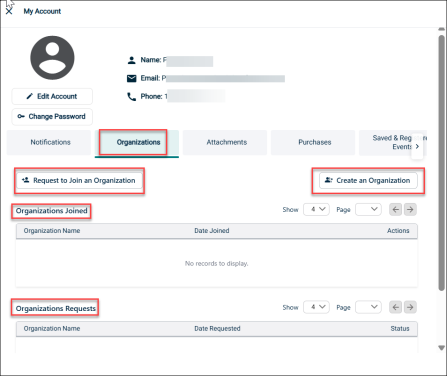
This tab displays a list of all organizations you are a member of. You can also create an organization and request to join an organization here.
Request to Join an Organization
-
Click Request to Join an Organization button.
NOTE Requestors logging on to Event Manger for the first time are also presented this popup which displays the list of public organizations. They can select the organizations that they want to join from the Organizations dropdown list. If auto approval is enabled, the request is immediately accepted.
-
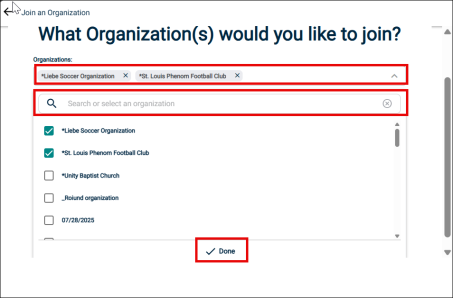
Join an Organization page will open, click the Organizations drop-down.
-
Search and select the organizations you would like to join and click Done.
NOTE You can also click inside the box and select from the list of public organizations.
-
Click Join Organization button to submit your request.

NOTE If the tenant administrator has enabled the auto approval option for public organizations, the request is instantly approved. A confirmation message is displayed on the page.
Create an Organization
-
Click Create an Organization button. This will open the Create an Organization page with organization creation form.
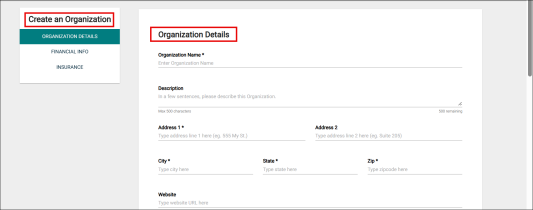
NOTE All required fields are indicated with an asterisk.
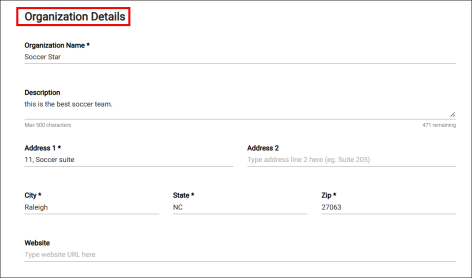
Organization Details
-
Enter the Organization Name.
-
Enter the Description of the organization.
NOTE There is a character limit of 500 characters for description.
-
Enter the organization's address information under Address 1, Address 2, City, State, and Zip.
-
Enter the organization's Website, if applicable.
Financial Info
Provide any financial information that is relevant for the organization.
-
Select an Organization Type.
-
Select the Payment Type.
-
Select the Invoice Type.
-
Enter the organization's FEIN (Federal Tax ID), if applicable.

Insurance Info
-
Enter the organization's insurance information, if relevant, in the Insurance Company, Policy Number, Coverage Amount, and Coverage Expiration fields.
-
Click Choose Insurance Document or paste the link for document if you wish to add any.
-
Click Upload to upload the documents if relevant.
-
Click Submit to complete your request.
NOTE Your Organization request will be reviewed and you will receive notification once the request has been approved or denied.

My Attachments
This tab displays a list of all images or attachments you have uploaded to the Community section in Event Manager.
-
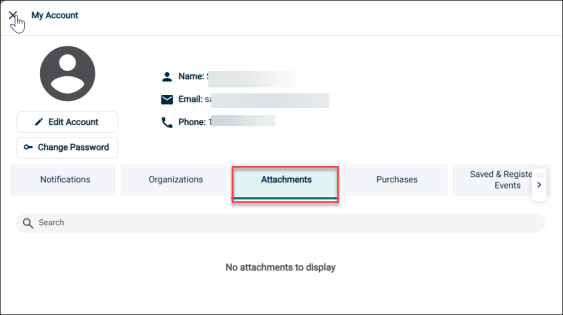
Click on the Attachments tab within the My Account section.
-
All the attached files including images and general attachments will be listed.
-
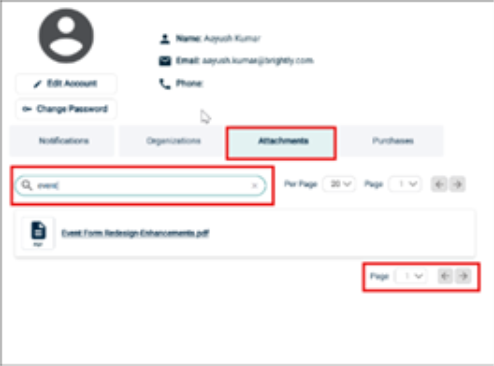
Click on the attachment you would like to view. It will open the file/image in a new tab.
-
You can also filter the list of attachments using the Search bar.
-
Type the name in the Search bar and hit Enter, the attachment will get filter out from the list.
-
You can also control the number of entries to be displayed in a page and number of pages using the Pagination option present in the tab.
My Purchases
This tab allows you to view and confirm any sale items you have purchased for events in the Purchase section.
-
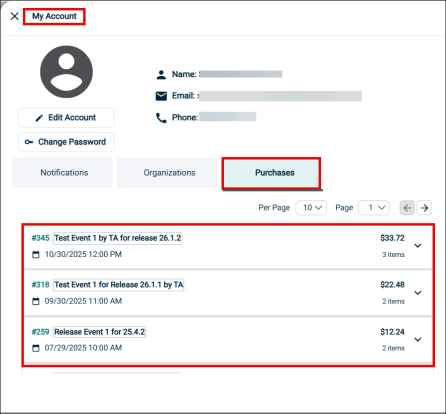
Click on the Purchase tab within the My Account section.
-
A comprehensive list of all your purchases will be displayed.
-
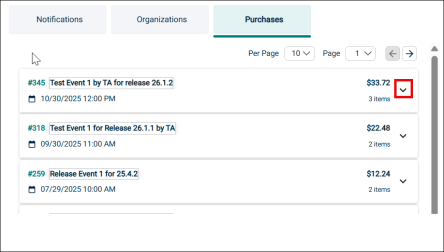
To see a detailed breakdown of charges for a specific event, click the down arrow next to the event.
-
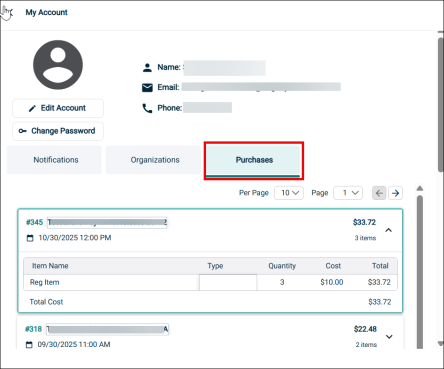
The detailed information including the item name, type, quantity, individual cost, and total price will be displayed for each purchase.
-
You can also click on the event number to view the event in the public calendar.
-
You can also use pagination to choose how many items appear per page and easily navigate between pages using the drop-downs and arrows.
Saved & Registered Events
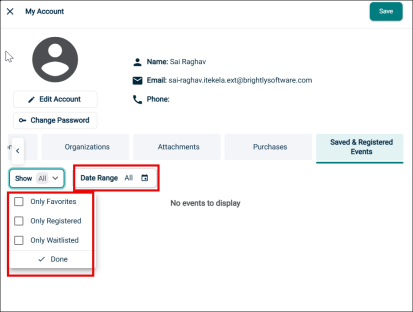
This tab gives you a unified view of all your events including events that you have registered for, have marked as favorites, or have added to your wait list.
-
Click the user profile icon and select Manage My Account.
-
Open the Saved and Registered tab.
-
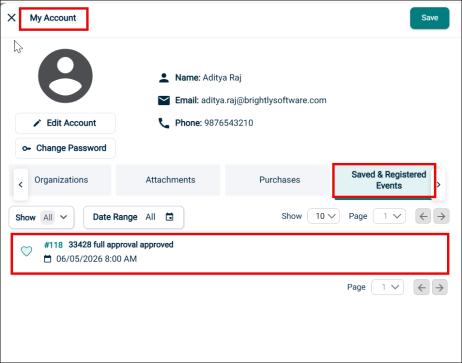
This opens a combined list of favorite, registered, and waitlisted events.
-
Each event card or event IDs displays key details like title, date, time, status, etc.
-
You can click on an event title to open that event on the public calendar.
-
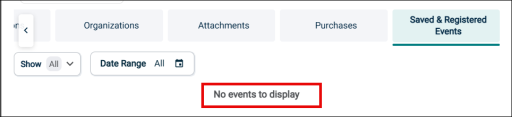
If you have no followed events at all, a message displays, No events to display.
-
You can also refine the event list using the date range and event type filters.